


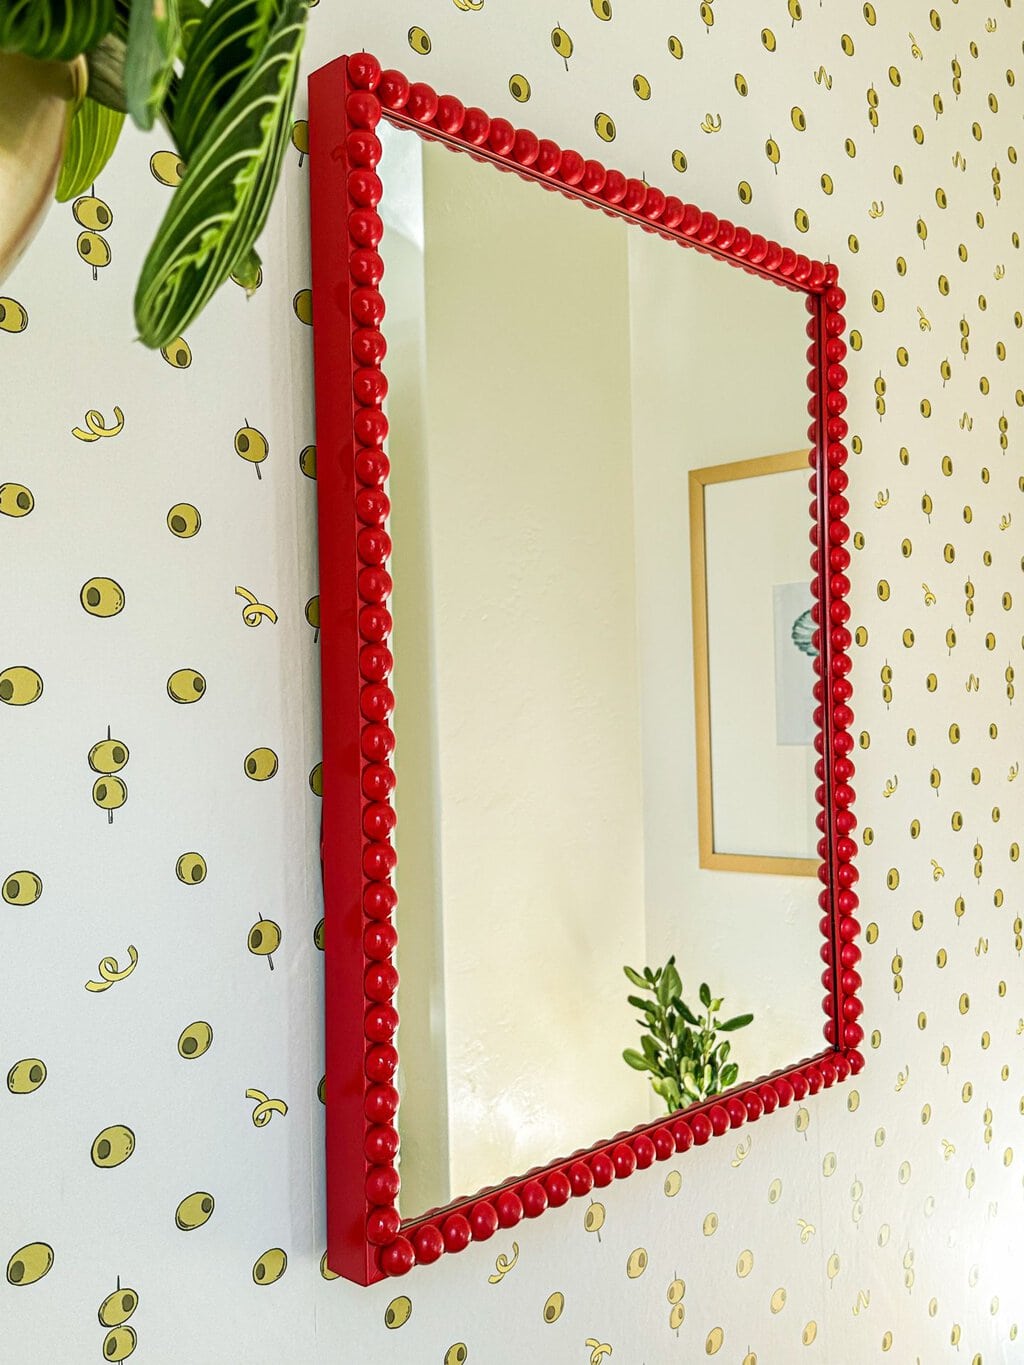
Say hello to the newest, and cutest mirror in my house! I have been obsessed with these bobbin mirrors since I started pinning for our new house. You can DIY a bobbin mirror for less than $60 and I’m going to show you how easy it is!
The Easiest home DIY!
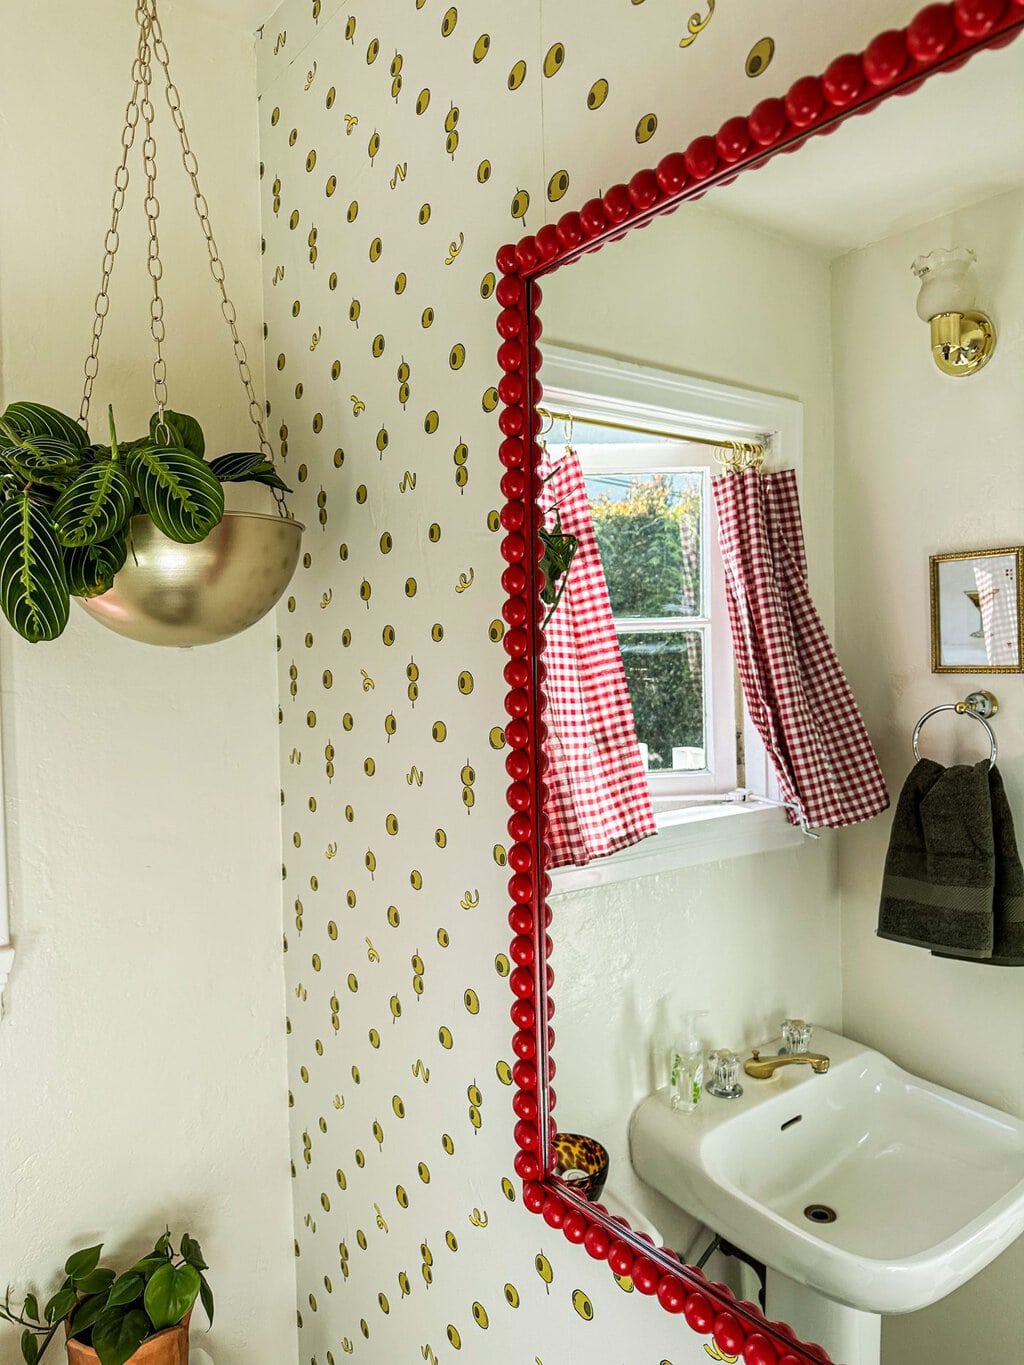
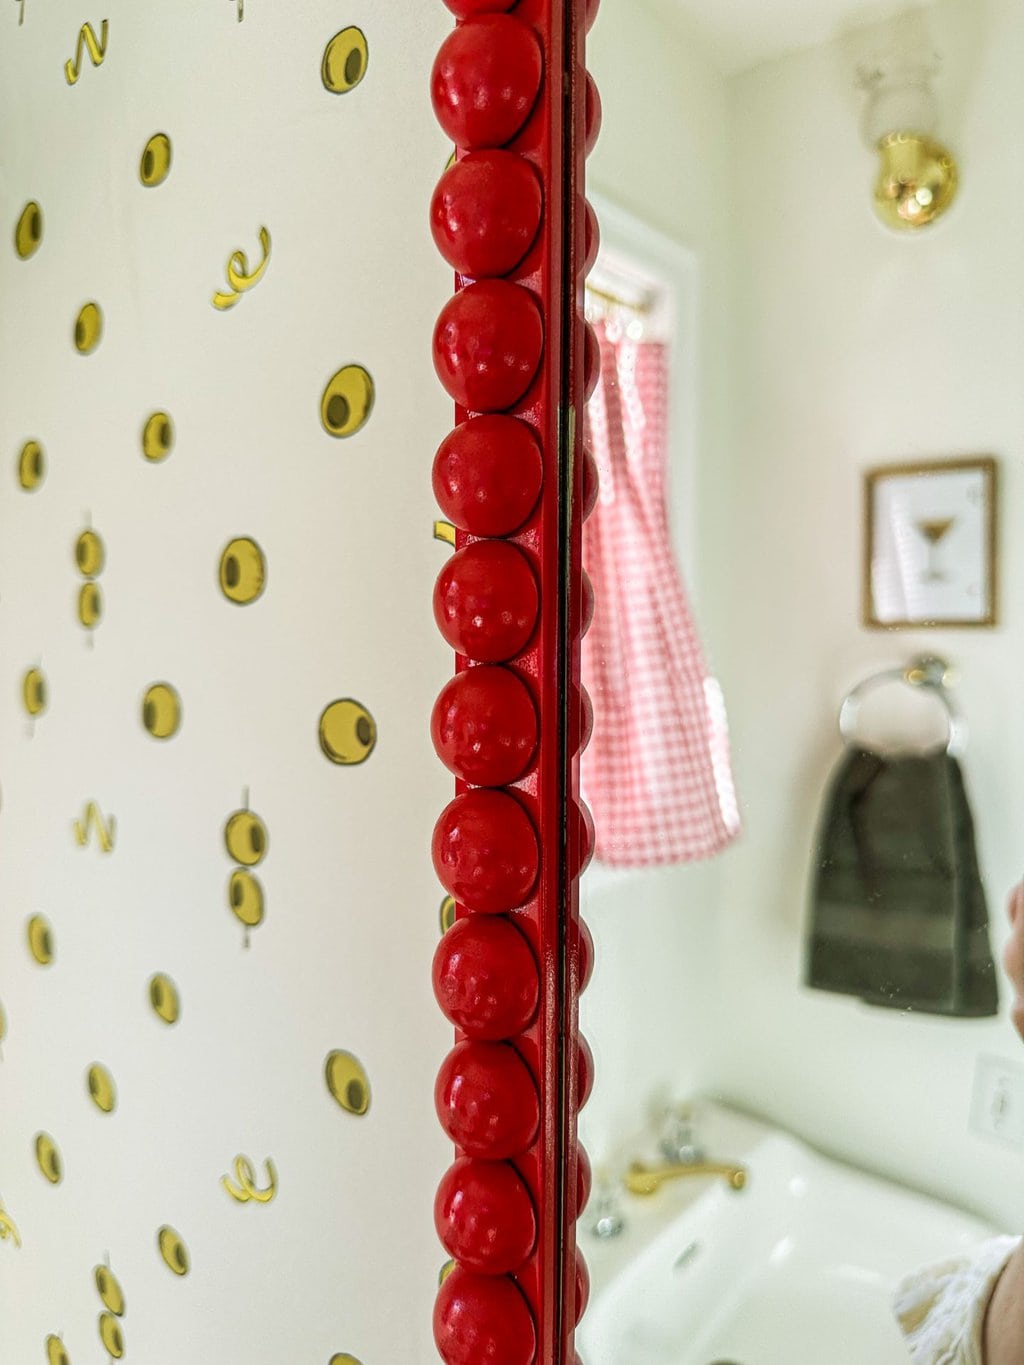
I knew I wanted a bobbin mirror for the new martini bathroom makeover and I wanted it to make a statement. This bright red bobbin mirror POPS against our martini wallpaper and I just love it. I want one in every room in the house now.
You only need a few simple supplies for this DIY Bobbin Mirror and you can pick up a cheap mirror at Home goods (this is what I did) or maybe even repurpose a mirror you already have.
This is a very simple DIY that does not take a lot of skill and can certainly be finished in a day. You can customize it with any color or shape and shouldn’t cost you more than $40-60 depending on what mirror you choose. This same process can also be used on picture or art frames instead of a mirror.
Have I convinced you yet?! Let’s make one!
Supplies:
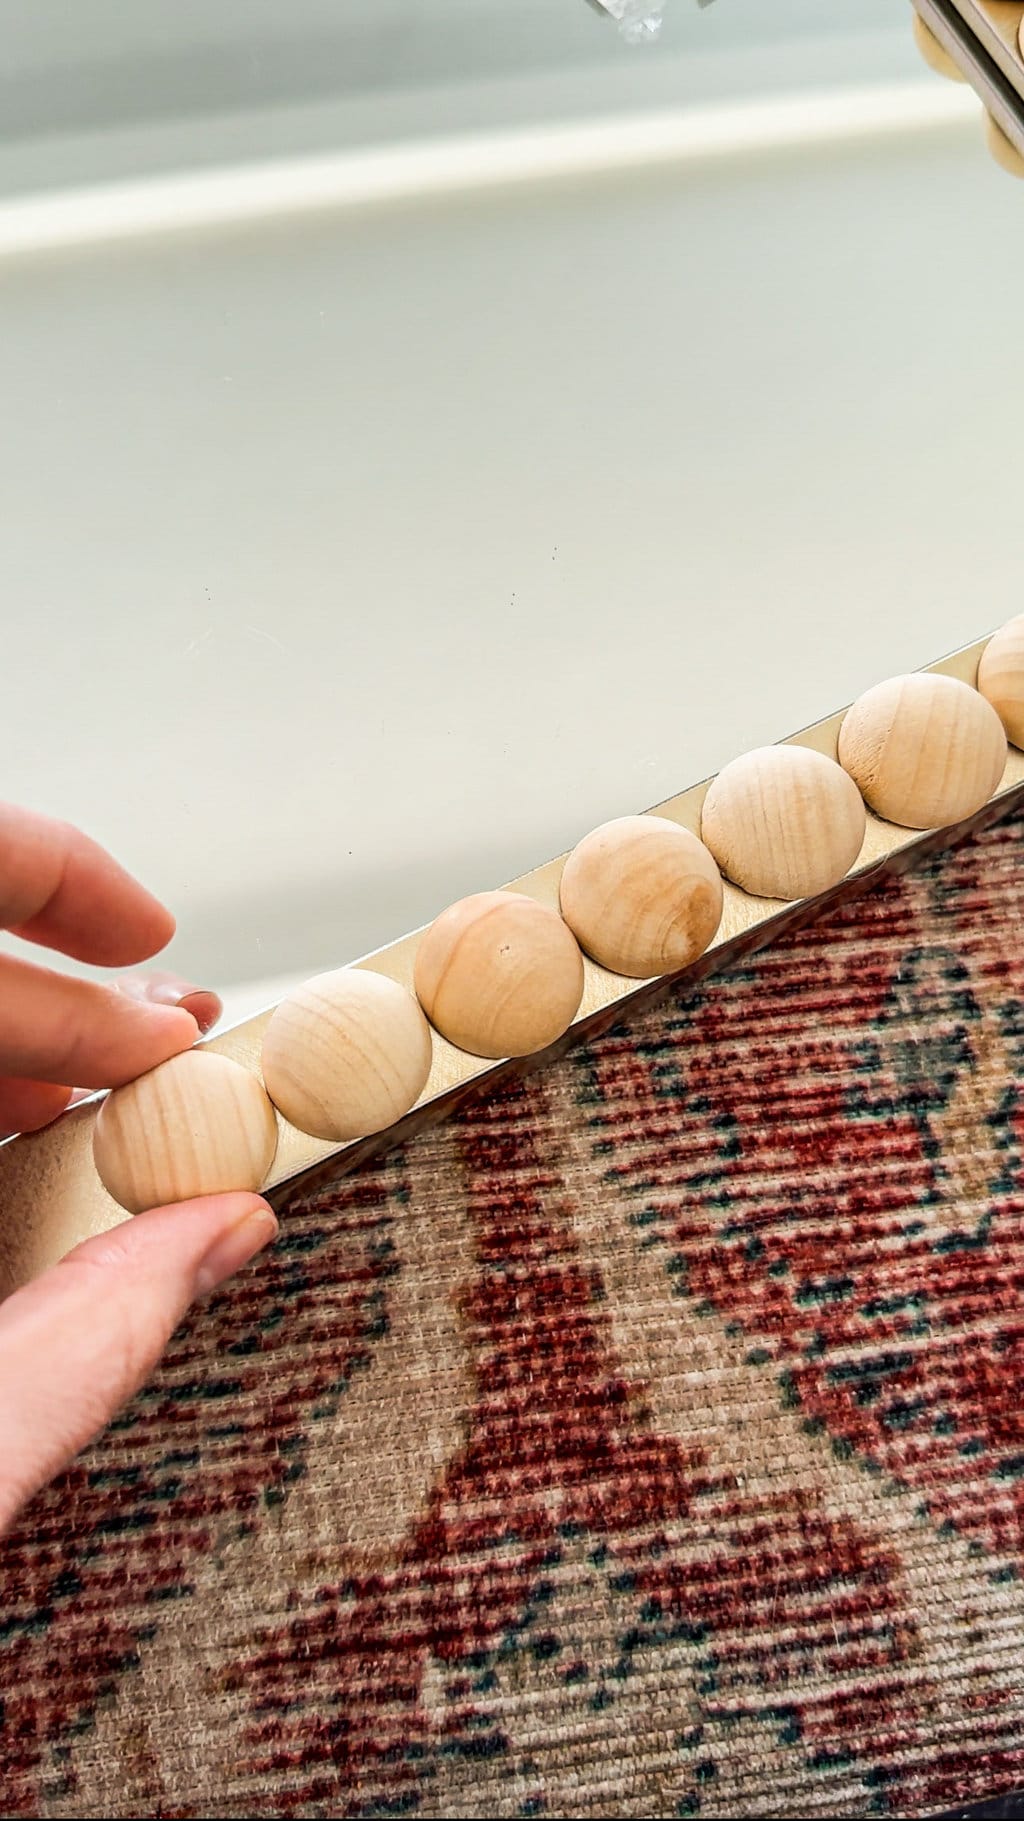
- Mirror of Choice– I found my mirror at home goods for $30. You can repurpose one you already have, thrift one or buy it new. It can be round, oval, square or rectangle but just be sure it has a 1 inch border around, this is key!
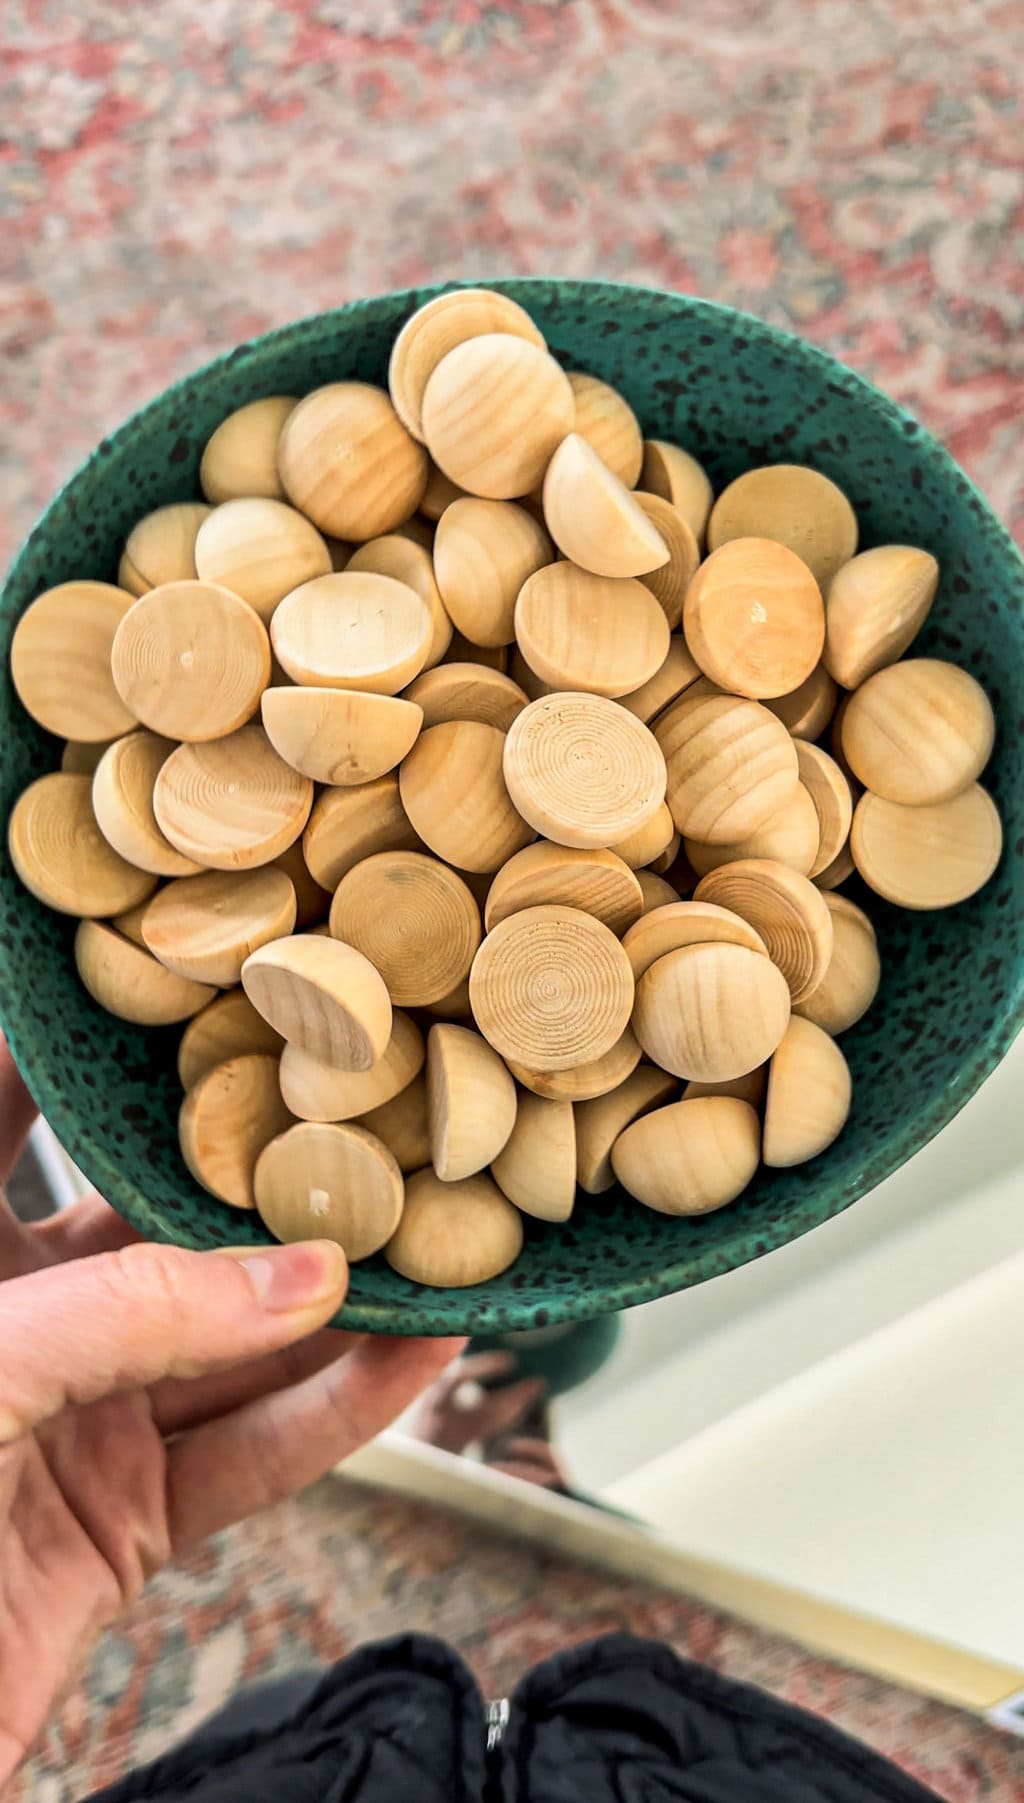
- 1 inch Half Wooden Spheres – I bought two bags of these flat half wooden spheres for $12! I bought two bags, but I only ended up needing one.
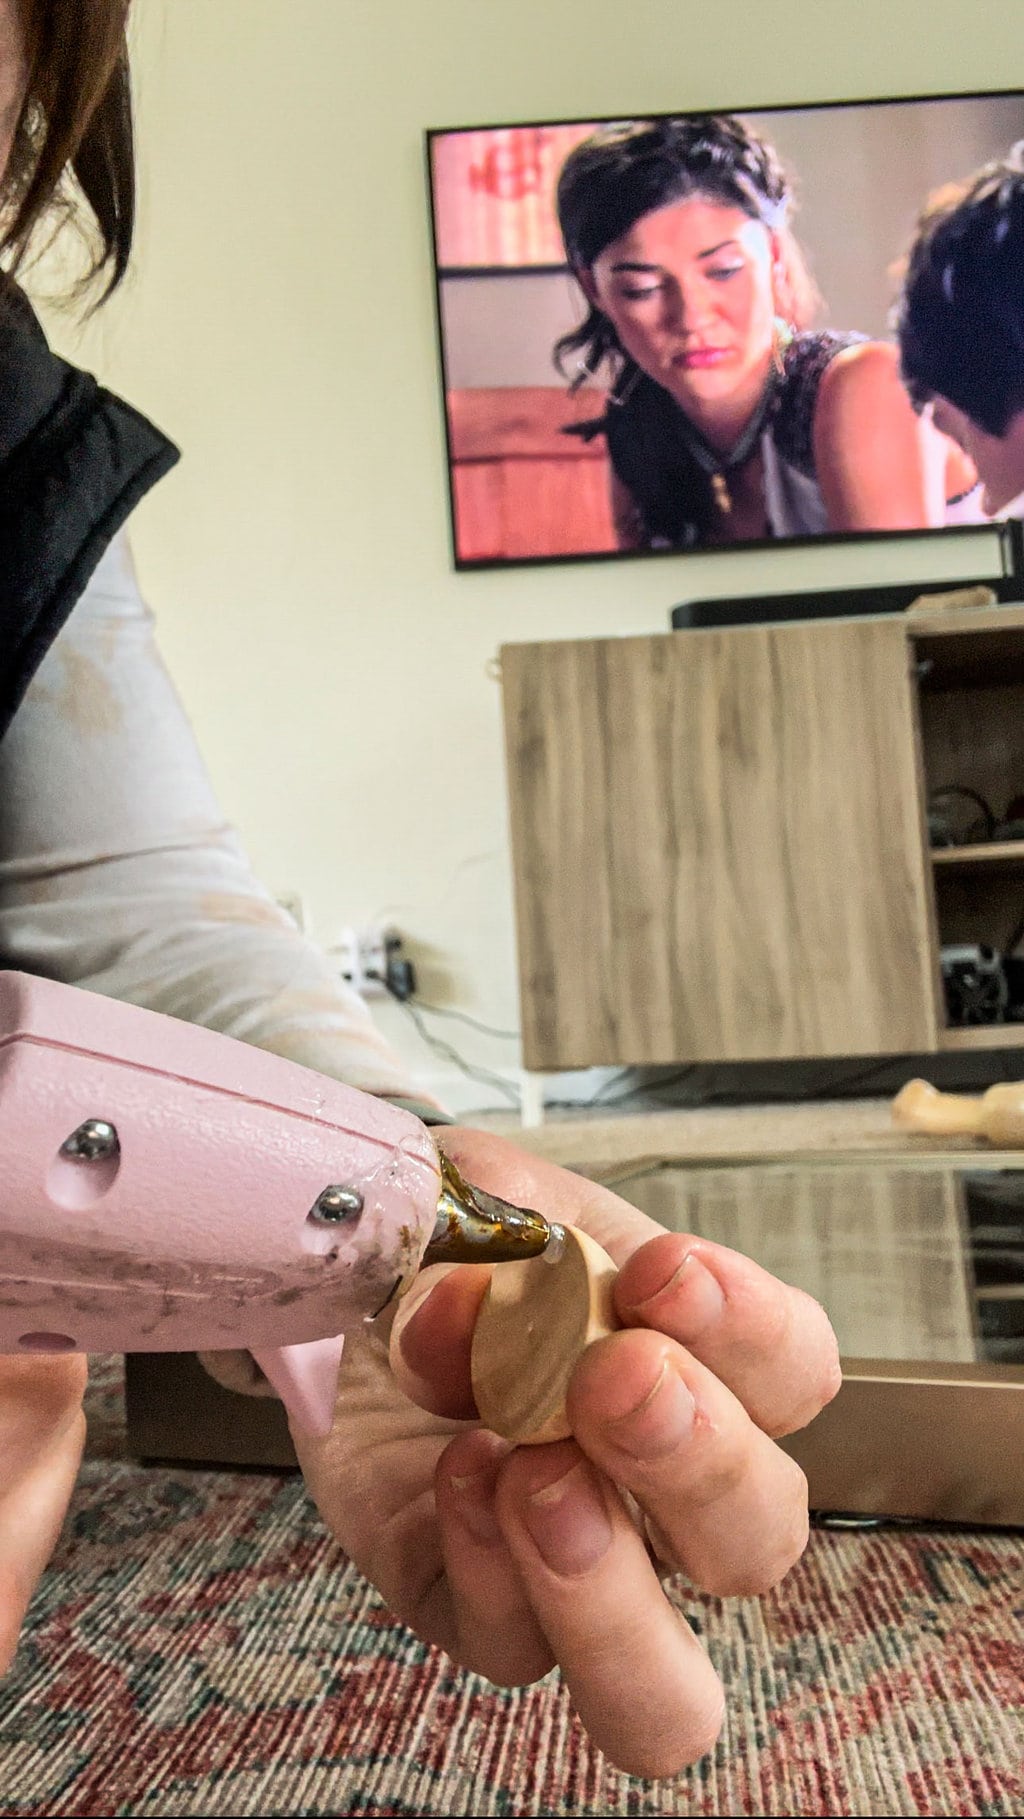
- Hot Glue- I used a hot glue gun to glue my spheres on but you could probably use super glue too.
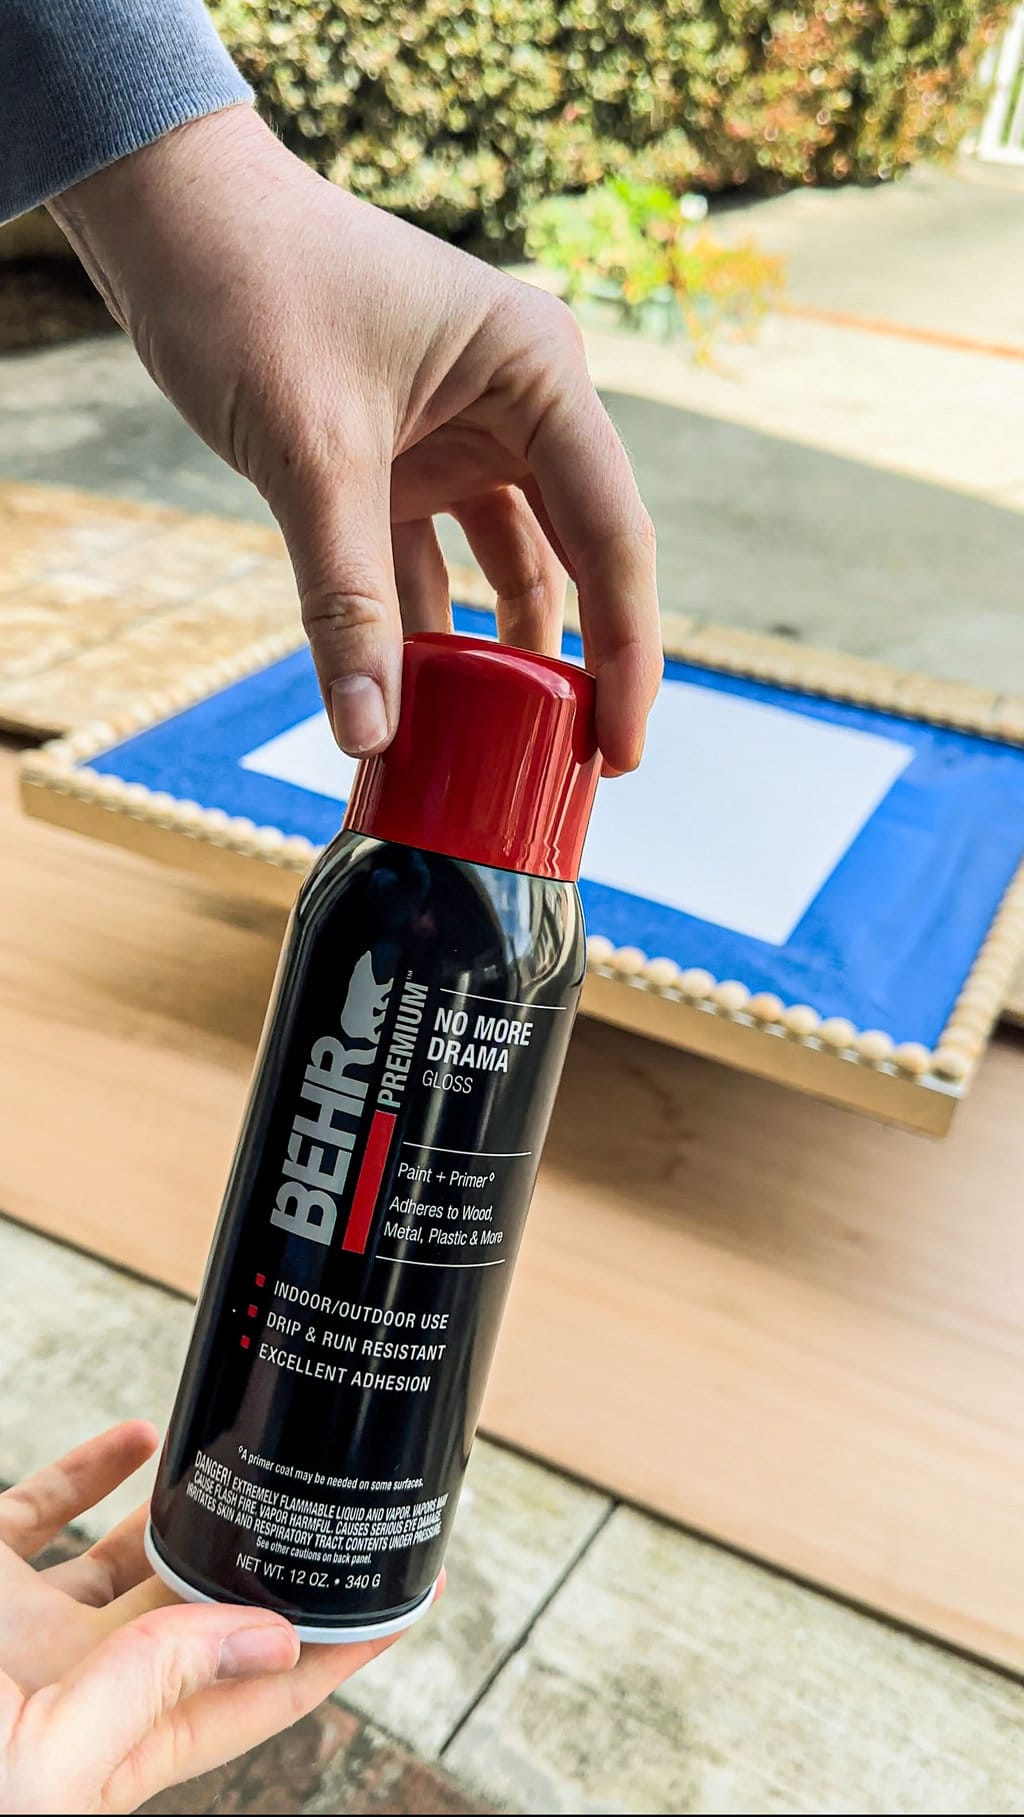
- Spray Paint- I wanted a bold red so I used Behr ‘No more Drama’ with a high gloss finish.
How to make a DIY Bobbin Mirror:
- Clean and Prep your Mirror – Remove sticker price tags and clean and dry the edges.
- Glue the Half Wooden Spheres– Fire up your hot glue gun and begin glueing on the wooden spheres to the mirrors border. You just need a little glue in the center of each sphere. I used a nail file to file down a few around the edges that overlapped the border a little.
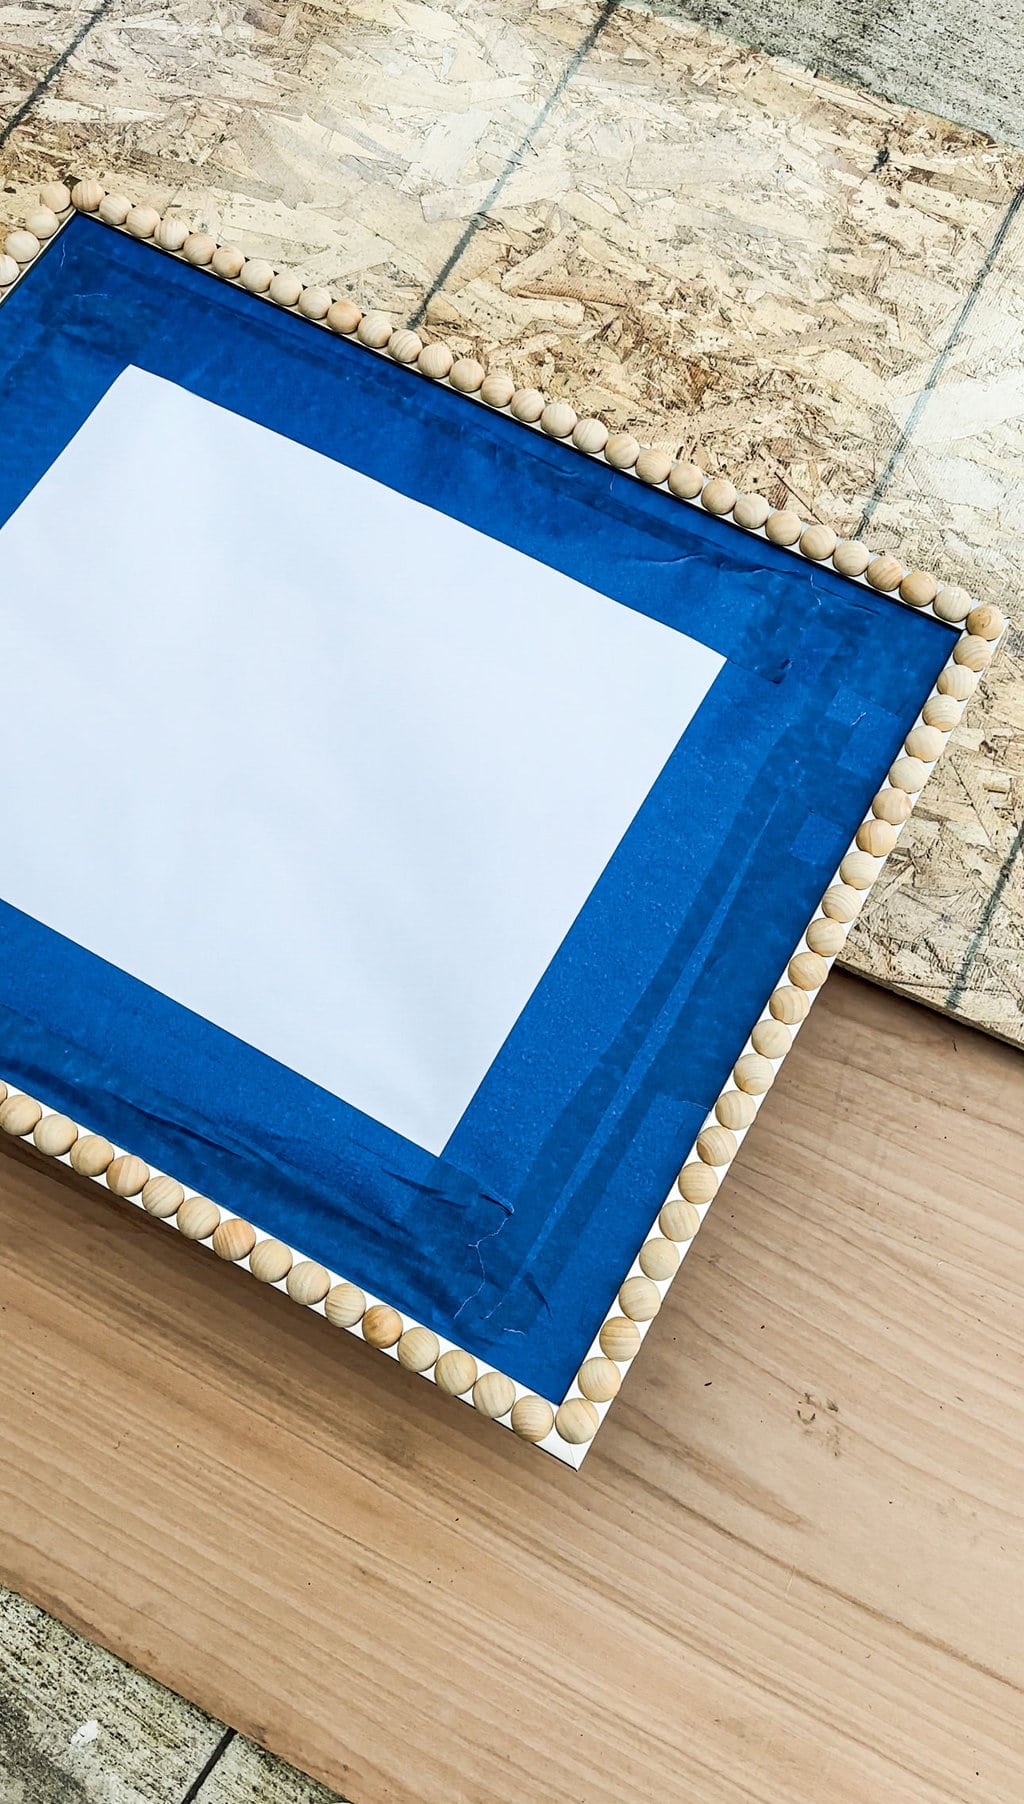
4. Cover the Glass- With masking tape and paper, cover the 100% of the glass on the mirror to prep for spray paint.
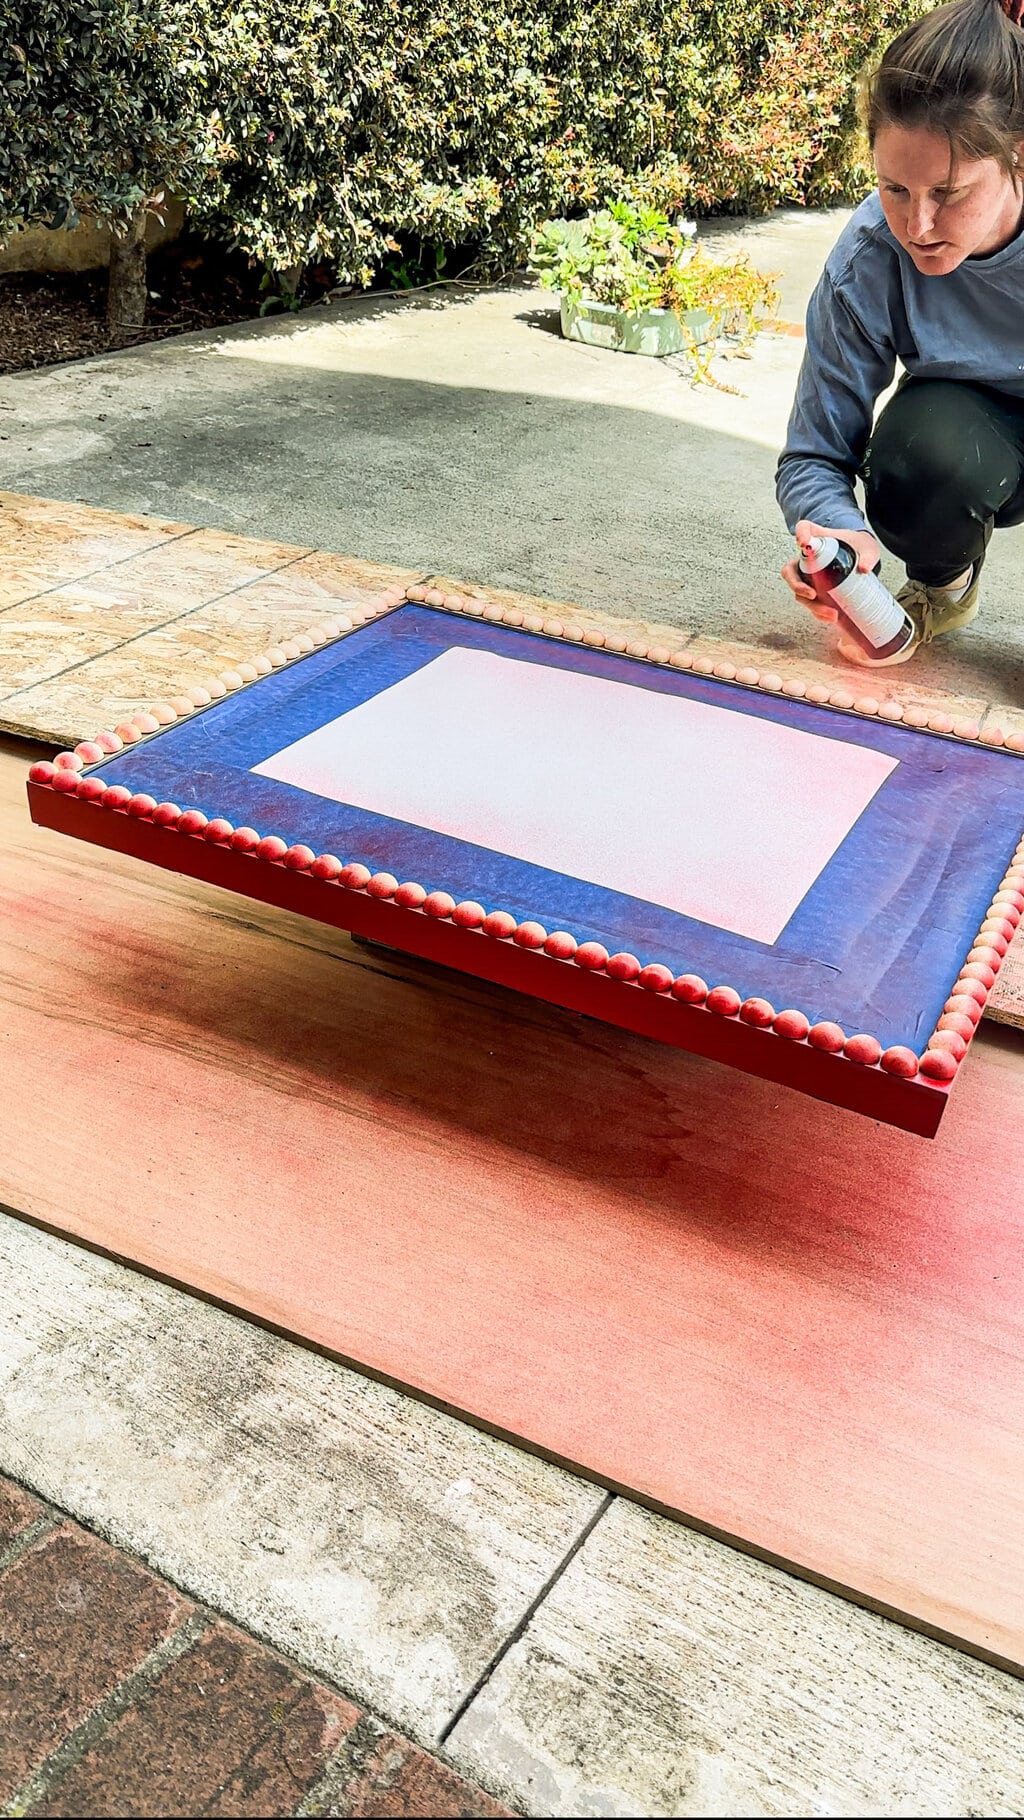
5. Spray Paint- Place the mirror on top of a card board box about half the size of your mirror so that the edges are accessible. Spray paint two light coats of paint evenly on the edges and over the wooden spheres. Wait one hour between coats.
Remove the masking- Allow the mirror to dry for 4-6 hours or overnight and remove the tape and paper. Voila!
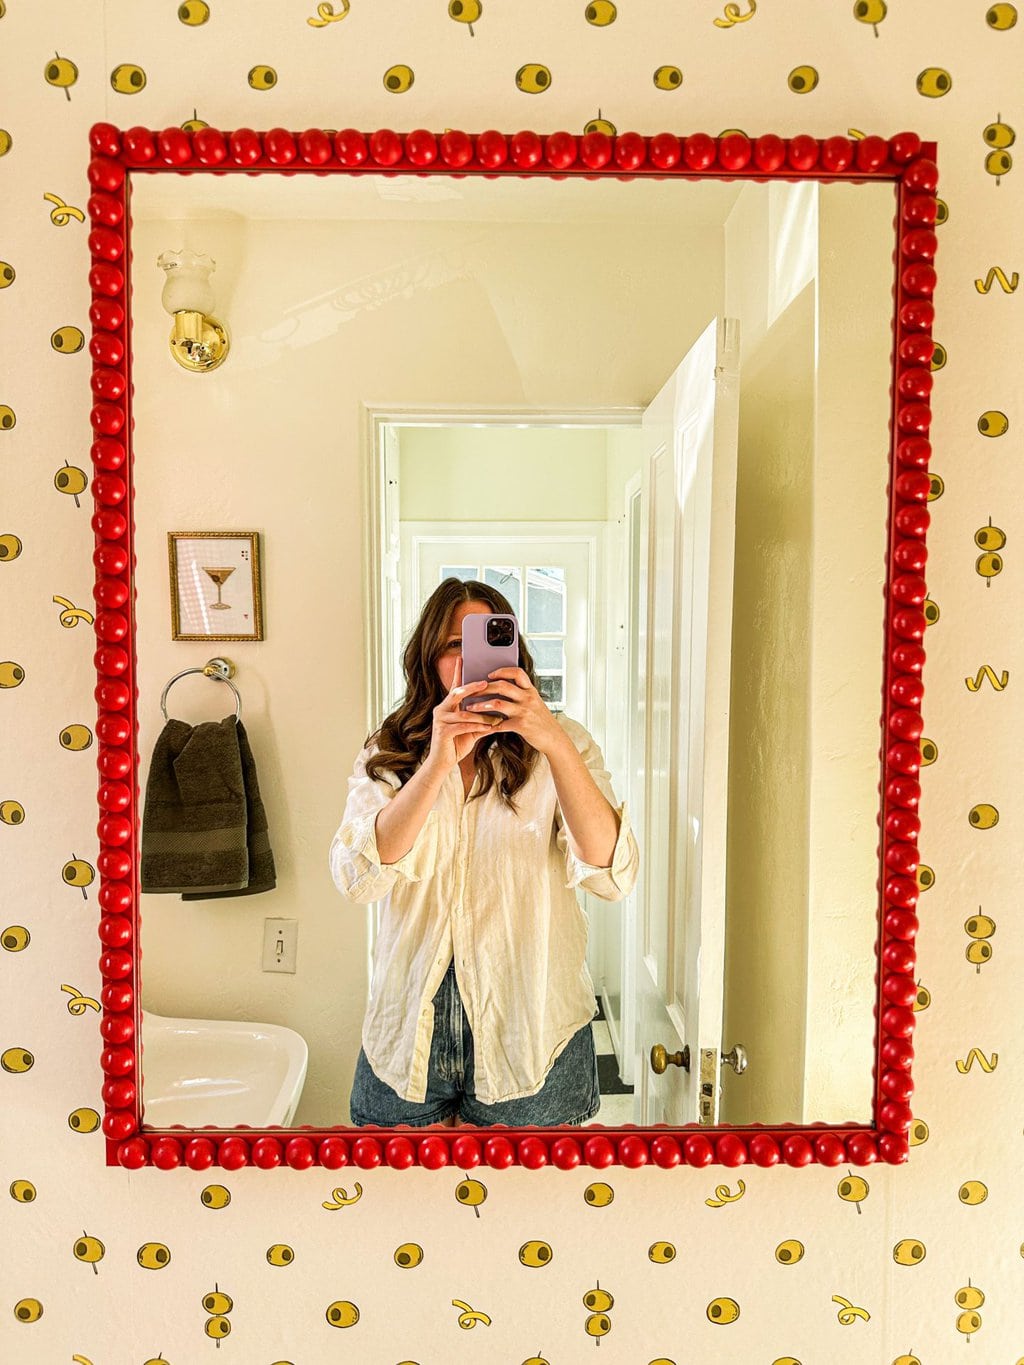
How do you like it?! I think it is so funky, bold and makes the wallpaper pop. It’s my new favorite selfie mirror and for good reason. I hope you make a DIY Bobbin Mirror in your own home!
For more of my DIY adventures, follow me on Instagram and Pinterest!


join elizabeth on the rocks
Join our newsletter to chat about all things food, cocktails, home decor, and more!